最近加入了使用Plurk的行列,應該也來玩一下 Plurk API 才是
( 其實是懶的發噗想寫個自動發噗程式 >”< )
在官網中 http://www.plurk.com/API 提供了JAVA 與 Python 的例子,
為求簡單使用,在這邊選擇使用 Python 語言
先至 Python 官方網站下載安裝程式
http://www.python.org/download/
在這邊選擇使用Python 2.6.4,如需要更多額外支援也可選擇使用 ActivePython
http://www.activestate.com/activepython/
安裝畫面,一直按 Next 安裝即可

安裝完成後
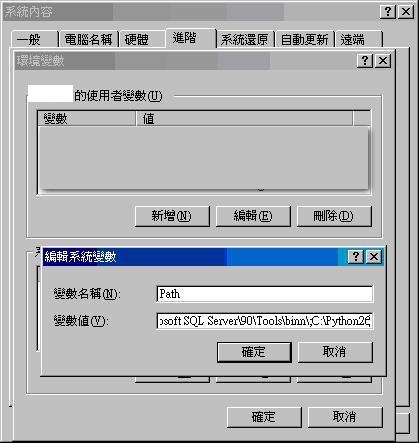
在 環境變數 Path 中加入 Python 安裝路徑 C:\Python26
到Plurk API 網站申請 API Key,他會寄一份 API Key 到你的信箱
在這裡先直接使用,官方的例子做測試
輸入好API Key ,Plurk 帳號密碼與自己要發的噗,
將下方修改後的程式儲存成 test.py (下列範例無法在 Python 3 執行)
#--- Setup ----------------------------------------------

  import urllib, urllib2, cookielib
opener = urllib2.build_opener(urllib2.HTTPCookieProcessor())
api_key = '你的API Key'
get_api_url = lambda x: 'http://www.plurk.com/API%s' % x
encode = urllib.urlencode
#--- Requests ----------------------------------------------
fp = opener.open(get_api_url('/Users/login'),
encode({'username': '你的帳號',
'password': '你的密碼',
'api_key': api_key}))
print fp.read()
fp = opener.open(get_api_url('/Timeline/plurkAdd'),
encode({'content': '你要輸入的噗',
'qualifier': 'says',
'lang': 'tr_ch',
'api_key': api_key}))
print fp.read()
如果輸入中文記得檔案格式儲存成 UTF-8喔,不然會有下列錯誤

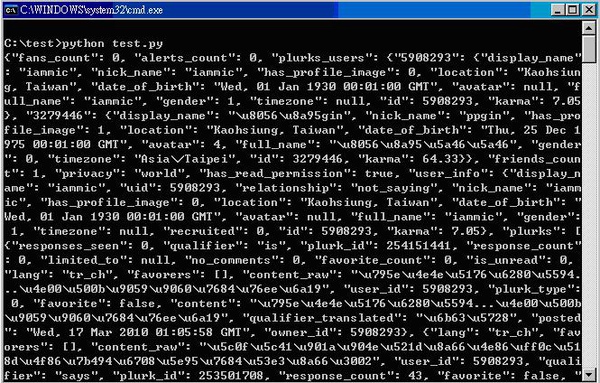
在命令提示字元中輸入 python test.py 執行,
也可以直接用滑鼠雙擊檔案執行
耶!~ 成功發送出去的噗


 留言列表
留言列表